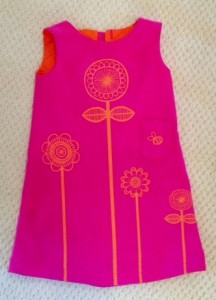
Simplicity 5540 WIP

I am the WIP (work in progress) Queen.   I have drawers and boxes of the stuff.   You can hardly move in my office, spare bedroom and wardrobe for fabric, Christmas crafts, Guide crafts, kits off the front of magazines, paper, card, lino printing, stamps, embossing folders, ribbons, buttons, thread, bobbins…   Got the picture yet?

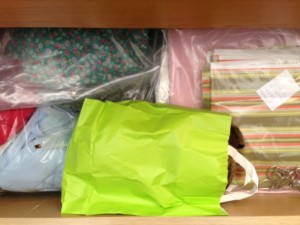
This drawer contains a dress that needs mending, several bag making projects from my ‘make every bag in the Lisa Lam book‘ quest, a couple of dress patterns with fabric, fabric to make Olivia the Rainbow Guides mascot a new uniform, and some big knitting.

drawer 2

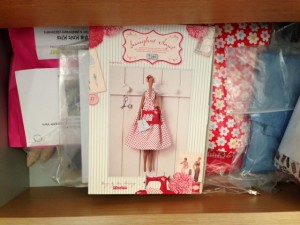
This drawer has more big knitting, a Tilda Sewing Angel, more dresses, a cancelled Craftyguider order and loads more.

drawer1The drawers are full, and do not include all the ‘buy a metre of fabric to use for a project that may come up one day’ projects.   I did manage 4 months of not buying anything unless it was specifically to make something, but after April, I was back on the treating myself slide.

Anthea Willis (@ForestFlower23 and Tales From Mount Pleasant) has a similar addiction to mine and has started a #WIPslinky party on her blog on the last Tuesday of the month.   She’ll show you hers if you show her yours.

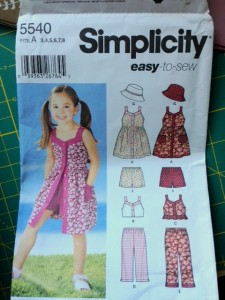
My first entry is Simplicity pattern 5540.   It should look like this…

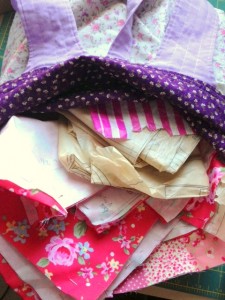
pattern girls…but for the last couple of weeks mine has looked like this.

dress bitsThis is two cut up dresses; one each for my 6 year old and my 4 year old.   I need to get a move on or a) there will be no more summer and b) the girls will grow out of them before the first stitch has even been sewn.

Hopefully I will be able to post a picture of the finished garments soon and then I will be back on the last Tuesday in August with my next WIP to complete.

Anyone willing to share their WIPs, head over to Anthea’s blog and link up.   See you there!

Follow on Bloglovin

Crafty Creatives Box 13

I’ve been subscribing to the Crafty Creatives boxes since box 2.   I missed box one which was floral themed, and now their birthday box, box 13, is a flower fest.

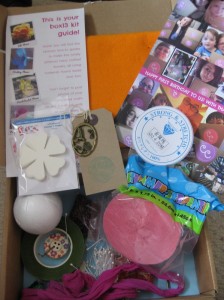
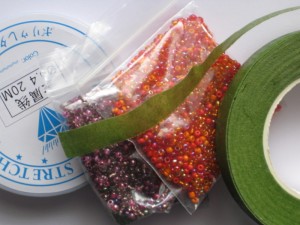
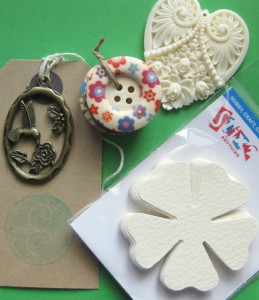
IMG_3389Normally the boxes are made up of an art card, some themed craft supplies and a kit.   However this special birthday box has 5 kits for different flowers, plus some other goodies.   One item that wasn’t photographed was the birthday balloon.   With 2 Craftyguidelets in the house, this was nabbed as soon as I opened the box.

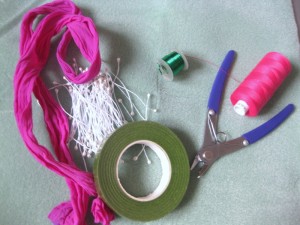
The first kit involved changing this pile of goodies…

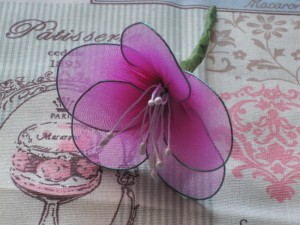
IMG_3393…into this lovely stocking flower.

IMG_3400I’ve still got enough bits to make more, and I’ll be on the lookout for some cheap coloured tights for different colours.

Next up I powered up the glue gun to make the felt flower.

IMG_3403I just don’t think this came out very well.   Added to this the fact that I managed to burn my finger on the glue, it was my least favourite project.   I might save the orange felt sheet for something else rather than making another one.

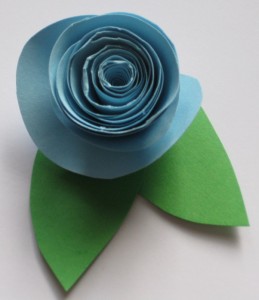
Next came the paper rose hair slide.

IMG_3406I’ve made flowers like this before, but I don’t think I’ll be making it into a hair grip.   There are some lovely beads in previous boxes that I haven’t used yet that may become hair clips instead.

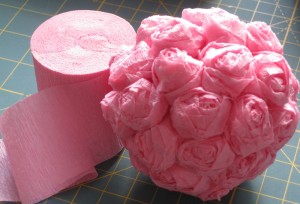
Finally came the crepe paper flower bunch.

IMG_3405This was my second favourite project after the stocking flower (once I’d juggled various pots of PVA and dug out nozzles with bent paperclips).   I might make this into a lollipop tree using a thin piece of dowelling and a pot.

The last kit is the French beaded flower.

IMG_3411This requires more time so it’ll be kept for another evening crafting session.

I’m still left with some other goodies to use up.   Probably some necklaces and some papercrafting in the future.

IMG_3413I have had fun with this box.   I’ve made more than usual because it’s been kit-based, but I think I prefer the normal format.

What would you do with the bits I’ve got left?


Linking up to Handmade Harbour’s Handmade Monday blog.

Handmade Harbour

Meal Planning Monday 29.7.13

After a week’s break because of holidays, I’m back pondering our meals for the week ahead.   I’ve been spoilt by not having to plan meals, cook meals and wash up after them for a week at Centerparcs.   The only catering I was responsible for was the morning porridge and the duck food.

IMG_3342Having used up all the perishable foods, I sent husband off with the Craftyguidelets and a huge shopping list to do a scan and shop.   They did well, so our plan for the week ahead is as follows:

Monday: tuna pasta bake with sweetcorn

Tuesday: ham, egg and chips

Wednesday: salad

Thursday: spaghetti bolognaise (and quorn bolognaise)

Friday: freezer dive

Saturday and Sunday: winging it!

Keeping it simple this week as the Craftyguidelets have a full on summer holiday planned for me.

Linking up as always with Mrs M’s Meal Planning Monday.

Meal Planning Monday


Digi Stamps for Beginners – tutorial

I like making cards.   It’s one of the reasons that Craftyguider came into being.   I had so many things I wanted to try, and not enough friends and relatives to send cards to!   I can now make what I want, when I want, and any cards that aren’t intended for a specific recipient, go into my shop stock.   I sometimes raid my stock for cards too as everything I make is the same quality as I would use for my best friend’s card.

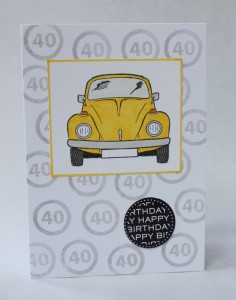
IMG_8180personalisable car card from craftyguider.com

One of the techniques I’ve never used is digital stamps.   Some of the paper crafters on twitter rave about them, but I’ve only ever used the stamps you ink up and print yourself.   Digi stamps provide the same outline image as an inked stamp, but they differ in that you can manipulate the image, for example by changing the size or flipping the image.   There is no physical stamp to store either as, once purchased, the image is emailed to you to download and store on your computer.

Handmade Harbour has come into the world of digi stamps in the last few months.   Wendy Massey has many gorgeous designs for almost every occasion to purchase and use to make cards.   She recently offered bloggers the opportunity to use digi stamps in a tutorial, and I was lucky to be chosen to receive a selection.   This will be the first time I’ve ever used digi stamps so this is a true beginners guide.

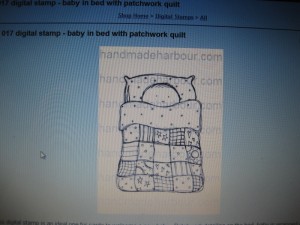
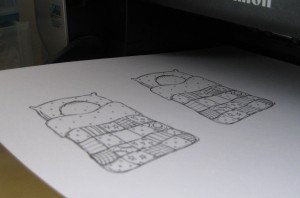
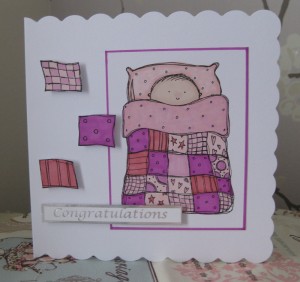
1. Obtain your digi stamp.   I chose this cute baby in bed with patchwork quilt as there are a number of babies due to friends and family in the next few months.

IMG_3367

2. Save the image that is attached to the email you receive to your computer.   I am no techie, but I managed this without help.   Going well so far!

IMG_3371

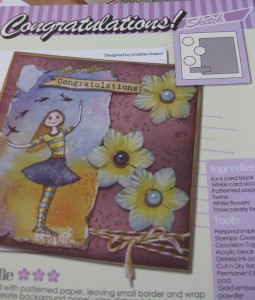
3. For simplicity, I copied and pasted the downloaded image to a new Word document.   I only needed to change the size and didn’t need any accurate dimensions.   It was my first attempt and ‘ish’ was good enough.   I based my design on a sketch from a Craftwork Cards Recipe Card from QVC.   Even though my card will look nothing like this, the elements I use will fit the sketch in the top right hand corner.

IMG_3369

4. Print the design onto good quality paper or light card.   Whatever you can get through your printer.   Trim the image leaving a border.

IMG_3374

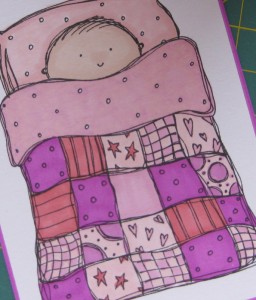
5. And now the fun part – colour it in!   I love promarkers, but you can use whatever colouring method you prefer.   tip – I made a border around the edge using a ruler and a promarker so the image matched

IMG_3383

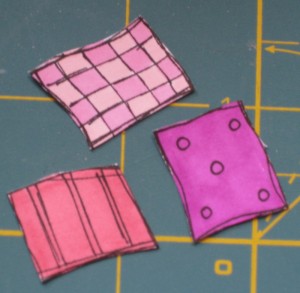
6. I printed another image slightly larger and used three squares as my accents.   I raised these and the ‘congratulations’ message using sticky foam pads.   tip – if you are posting your card, it’s cheaper to send if the image is flat rather than using foam pads

IMG_3385

7. Ta dah!   Now I’m going to hurry down the road to my neighbour’s house as she’s just given birth to a lovely baby girl.   Hope she likes it!

IMG_3387


I obtained the digi stamp for free from Handmade Harbour, but the words, images and opinions are my own.

Houghton Watermill

One sunny Saturday, the Craftyguider family plus Mother-in-Law needed a day out.   Mr Craftyguider found Houghton Mill, a National Trust property near Huntingdon, so we piled into the car and off we went.

Houghton7

The mill was almost demolished until the local villagers joined together to restore it to working order.   It is in a gorgeous position on the Great Ouse river, and many people were using the water around the mill for punting, kayaking, canoeing and swimming while we were there.

Houghton6


We arrived just before lunch and so had a lovely lunch in the tea room.   There were the usual jacket potato, sandwiches and kids lunchbox selection.   They made up sandwiches to order, and we went back later on for drinks and ice creams.

With the Craftyguidelets in tow, it was important to keep them amused, and there was a great booklet available to buy to do that.

Houghton4


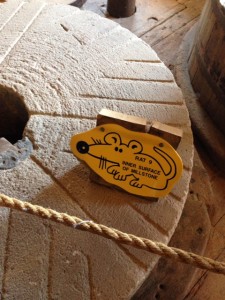
The booklet gets you to look for the yellow rats which refers you to the relevant section of the booklet.   It was also useful for the grown ups to get extra information on a self guided tour around the mill.   There were also lots of other child oriented activities dotted around including a telescope to spot wildlife through.

A couple of the most popular activities for the Craftyguidelets were the model of the mill and making flour.

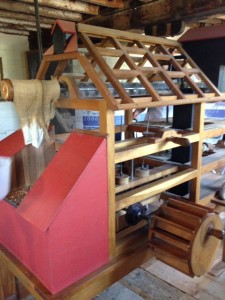
The mill model included tipping a jug of grain in one end, winding it through the mill using an auger, and tipping it out the other end.   There were also sacks to hoist up, and a working waterwheel.

Houghton2


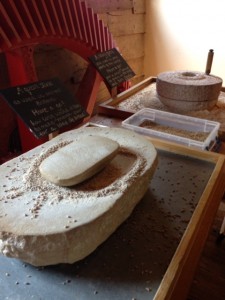
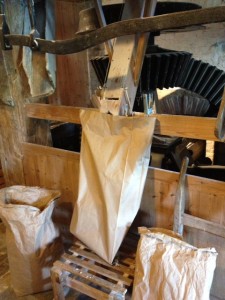
Once we had dragged them away from the mill model, they then became addicted to the millstones where they ground their own flour.   I don’t think I’d be able to wait for them to grind enough flour to make a loaf of bread though.   Conveniently there was some for sale if you wanted to buy it.

Houghton3


As it is an old building, you have to negotiate low beams (not easy for a 6’4″ husband), uneven floors and stairs.

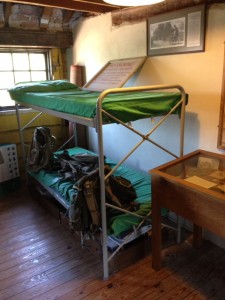
The mill also used to be a Youth Hostel.   I don’t think I would’ve enjoyed to stay there with all the rats around, and the beds don’t look that comfy.

Houghton1


The mill is still working, but unfortunately for us, it’s only on Sundays and Bank Holiday Mondays.

Houghton5


After walking round the mill, we went for a walk outside.   We could’ve done with a map as we took a wrong turn, but we just turned round and followed the path back past the swan and her cygnets.

Houghton8


The girls then got their bikes out and had a cycle round the grassy car park, before we went back home.

The wheat milled in Houghton Mill is grown at another National Trust property at the Wimpole Hall estate.   Perhaps that will be our next trip.

Meal Planning Monday 15.7.13

The last week of term.   I can’t believe how quickly a whole year has gone.   One little girl is moving to full day school in Reception and the other will be in Year 2.   Am I that old? (Don’t answer that!)

I haven’t been participating in Meal Planning Monday for a few weeks as life has been so hectic with all those end-of-year concerts, meetings for next class teachers, planning for the summer, and life in general.   But as I have a few minutes this morning, and I need to plan meals for this week anyway, I’ve allowed myself a bit of a break to blog.

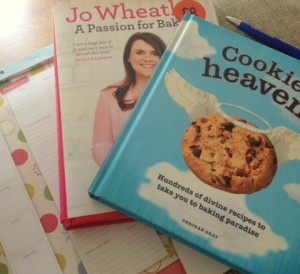
My main source of inspiration this week will probably come from these two books.

baking


The Craftyguidelets are making cards and gifts for the teachers as usual, and this year with 9 people including teachers, teaching assistants, a nursery nurse and a trainee to include, we are going with some baking action.   There will be a theme with the baking, but that’s another blog post.   With a ‘mocktails and cake’ picnic to prepare for the Guides as well, I think I need to check what supplies I have in the cupboard!

Unfortunately I cannot am not allowed to live on cake alone, so this is what I am planning for the week ahead.

Monday: grilled salmon and veg

Tuesday: jacket potatoes and salad

Wednesday: macaroni cheese

Thursday: ham, egg and chips

Friday: freezer dive

Saturday: BBQ if it’s nice, grill if it’s not

Sunday: cottage pie

Linking up as usual to the wonderful Mrs M’s Meal Planning Monday blog.

Teacher Thank You Cards

Today’s Handmade Monday post is brought to you by the creative Craftyguidelets.

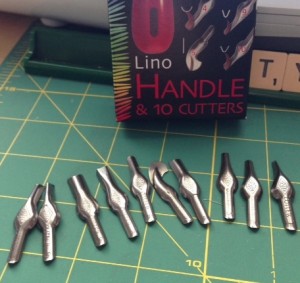
My daughters aged 4 and 6 have 9 teachers, teaching assistants, a nursery nurse and a trainee between them.   We always make cards and needed a new idea.   After an exploration of Pinterest, it seemed apples were the main theme (although try and explain ‘apple for the teacher’ to a six year old!).   With my new lino printing kit in it’s box, I felt a creation coming on.

card10

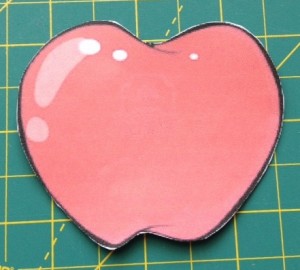
Firstly I found a cartoon apple shape to trace round as my drawing skills aren’t great.

card9


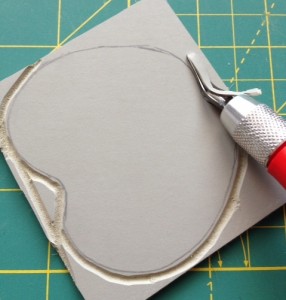
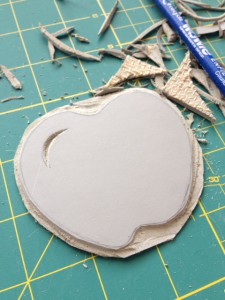
Then I traced the shape onto my lino.   I cut round the shape with scissors and warmed the piece with body heat to make it easier to cut.   Using the appropriate tools, I cut round the image and then added a small ‘shine’ detail.

card8


I then trimmed close to the image with scissors.

card7


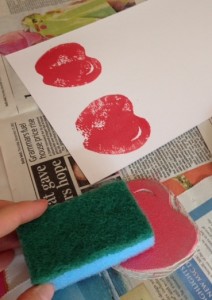
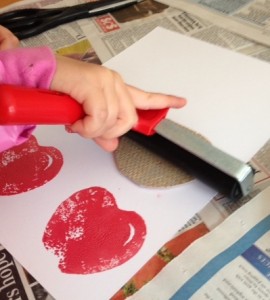
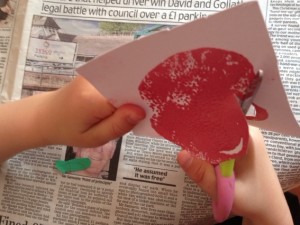
Then it was over to the Craftyguidelets.   We applied the ink to the lino with a sponge to get an even coverage.   Unfortunately the printing ink I bought was very tacky and didn’t cover very well, even though it was specifically recommended for lino printing.   It printed unevenly which is OK for the work of a 4 year old, but not for me as I wanted to use it for printing cards for sale.   Also, it still hadn’t dried properly after 36 hours.

card6


The lino was rollered down by myself and the Craftyguidelets to try and get an even print but to no avail.

card4


The girls cut out the apples (getting covered in tacky ink as they went!).

card5


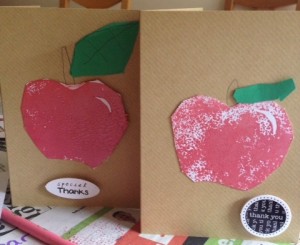
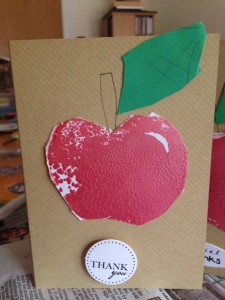
They then stuck the apples to some kraft cards, added a hand drawn stalk and a green paper leaf, and a ‘thank you’ message.

card1


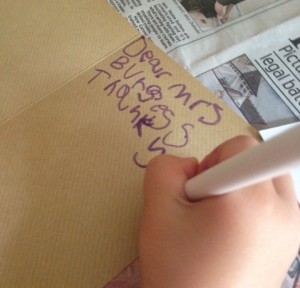
Just a matter of writing to all the teachers (the 4 year old wrote in 7 cards for all her helpers) in their bestest handwriting.   This is the 4 year old’s bestest writing.

card2


And ta-dah!

card3


Just 9 lots of teacher gifts to do now.   Best get baking!

What are your best ideas for teacher cards and gifts?

Because you said yes…

Because you said yes…

A young girl will feel the pride of being someone special as she carefully puts on her uniform for the very first time.

A girl can move to a new town and have “instant friendships” with girls she might never have met.

Parents will experience that special pride when they listen to their daughter say the Guide Promise for the first time.

Bright eyes will become a little brighter with excitement as the kindling finally catches on the first camp fire.

Nervous giggles will emit from tents as girls try to fall asleep their first night of camp.

The community, and yes, the world will be richer because a girl has learned the importance of caring for her environment and the warm feeling that comes from giving service to someone less fortunate than herself.

A parent will find a Promise Badge carefully tucked away in a drawer as their daughter packs to leave home for her first adventures as a young adult.

A young woman will contact the Guides one day and say, “I had so much fun when I was a Guide, I’d like to try being a Leader.”

…and the circle will continue – because you said yes!

source and author unknown
IMG_8264

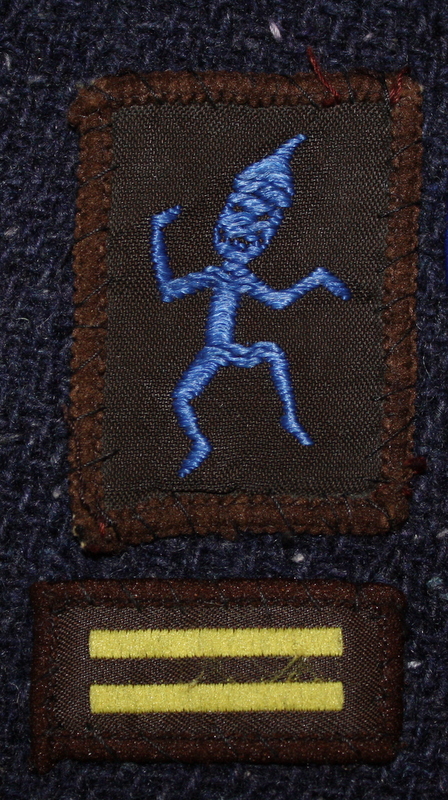
When I was about 8 or 9, I moved from Highgate to Enfield, changed school and just started to make friends.   I used to play outside with my siblings, and my sister and I were spotted by one of the neighbours.  Mrs Cockaday lived a few doors down and was just about to open a new Brownie and Guide unit.   My mum was happy for us to make new friends and try something new so we were amongst the first batch of girls to join.   Because of my age, I was only a Brownie for about a year and gained my Agility and Road badges.   I then flew up to Guides and my Guidey swottiness began.
IMG_8257

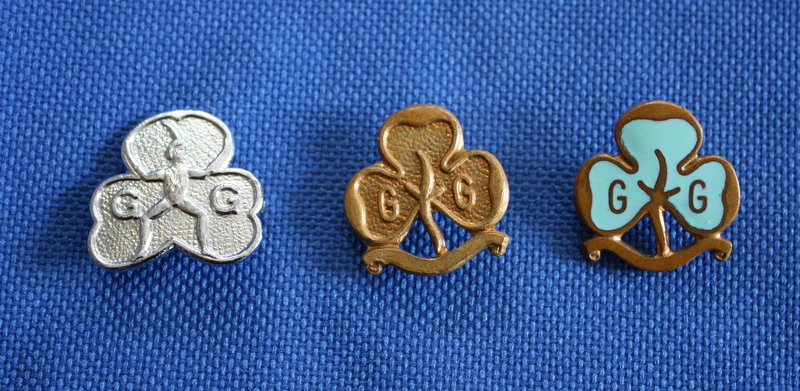
I loved being a Guide.   I went to all the camps, got all the collective badge emblems, over 50 interest badges, my service flash, patrol pennants, patrol purpose patches, Queens Guide award, Baden Powell Trefoil award – and then I was old enough to be a Ranger Guide.   Captain retired and I moved on.

I joined Rangers with a friend.   We went to a Youth Hostel, painted the hut, did our swimming trial for kayaking, and I made plans to do the new Queens Guide award.   But then it all went wrong.   The Venture Scouts were going to close, probably due to lack of leaders or members, so the Rangers were going to convert to Venture Scouts to combine the two units.   This would have been OK if the boys in the Venture Unit hadn’t have been my little brother’s mates.   No way was I giving up my evening to spend time with boys, especially them.   Unfortunately I hadn’t been told about becoming a Young Leader so I left Guiding.

A few years later, after I’d been to University (oblivious to SSAGO too as I commuted in 2 hours each way every day so couldn’t be in any of the clubs), I spotted an article in the local paper.   “Guide unit to close unless they find a new leader” sort of thing.   Much to the surprise of the District Commissioner, I answered the ad saying I’d help.   I ended up becoming leader, much to my surprise as I imagined Guide leaders all being older women.
IMG_8261

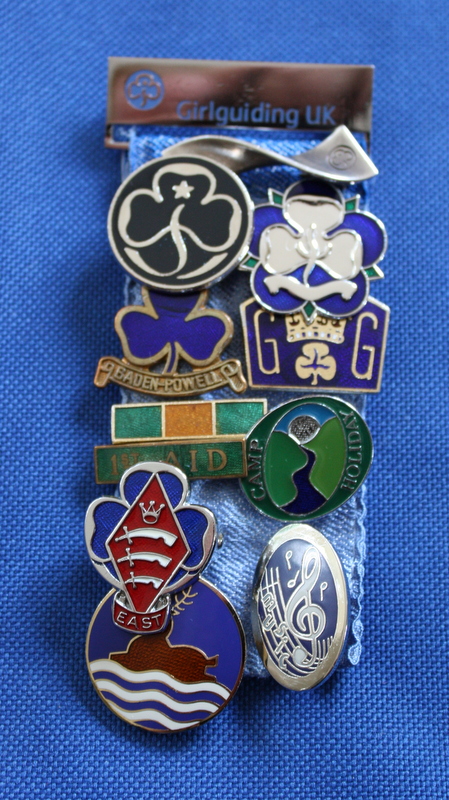
I’ve done most of the volunteer jobs in Guiding – leader of Rainbows, Brownies, Guides, Rangers, Young Leaders, District and Division Commissioner, I hold my camp, holiday, first aid and music licences, I can still tie my knots and I can light a fire using just one Cub Scout and some kindling.   Almost 19 years later and I am still here.   I tell people I had two daughters so they can take over my unit when I’m too doddery to carry on.   My blood is Guiding blue.

But the most important thing is that I’ve been part of the lives of hundreds of girls and young women because Mrs Cockaday, my Guide Captain, said yes.

If you want to say yes, just click here to find out more.   You don’t have to have been a Guidey swot, women who were “kicked out of the Brownies” as a child can still apply, men can help out in various ways.   Even if you have never been in Guiding at all, you can be trained up.   It looks great on a CV and a UCAS form, and as I sit here blurry eyed thinking of all those circles I’ve been part of, there are girls all over the UK who won’t get the chance to join in due to lack of leaders.

Unless you say yes.
Busy doing nothing

Fridays are my day off.   I don’t have a paid job, but as my stay-at-home mum/housewife/volunteering ‘job’ continues 24/7, I like to have a day when I don’t feel guilty sitting on the sofa watching Biggest Loser or doing some crafting for me rather than the website.

I think it is really important to just take a break: to take some time off, rest, slow down, reflect on life and sort your head out.   Lots of mums get mum-guilt if they aren’t filling up every spare moment with an activity.   I need to try and educate my brain into just switching off the guilt and be happy doing nothing.   I am not a failure, I just need this time to myself so when life switches back on, I’m more energised and ready to face dressing Polly Pocket in her 28th outfit of the day.

Meanwhile my day off today has included being woken up at 4am from a deep sleep by a 4yr old Craftyguidelet because her duvet was ‘being silly’, filling in on the school walking bus, doing some more preparation for Guide camp, changing the girls’ beds and doing 5 loads of washing, collating ideas I’ve collected for new Craftyguider products, doing 3 school runs, attending a parents meeting, vacuuming up downstairs in preparation for a delivery, tidying, doing some admin for my dad’s bakery, and cooking 3 versions of dinner.

Day off?

Clothkits Shift Dress

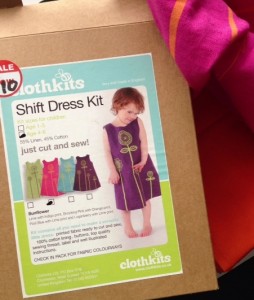
Very occasionally (ahem!) I visit Hobbycraft and buy essential (ahem ahem!) crafting supplies.   One essential purchase was a Clothkits shift dress kit in the sale section.
box


The price was reduced from £19.99 to £10 which was at a level where even a finished dress would be as expensive.   They had an age 4-6 pack in youngest Craftyguidelet’s favourite pink colour so into the basket it went.
Clothkits contain everything you need to make the dress.   In this one there were buttons, thread, lining fabric and printed fabric with all the pieces marked out in the three sizes.   The fabric was used as a pattern for cutting the lining, and the instructions were really clear.   Even after sewing one shoulder seam back to front and then inside out, I still managed to complete it in an afternoon (along with all the normal school runs, meal preparation etc.).

flat finished


I can’t believe how professional it looks!   Most importantly Craftyguidelet loves it and wore it the following day.   It survived a pretty hectic day in Legoland and is currently in the washing basket waiting for it’s next test.

The only criticism I have is the lack of size information to say what Clothkits consider the actual measurements of a 4-6 year old are.   Craftyguidelet is a slim 4 year old but I made the dress in a 5 year old size to give her room to grow into it.   I would say that it fits her now so perhaps I should have made it in age 6.

My only problem now is that my 6 year old wants me to make her a dress.   Back to the cutting table I go.

Linking to Handmade Harbour’s Handmade Monday as usual.   Pop over to see what other crafters are getting up to.    Also linking to Crafty Girl Linky Party on EverythingEtsy.com for the first time.