School Craft Club – Easter Garlands

On the last craft club of term, we had requests to make an Easter craft.   As the children make so many Easter themed crafts at school anyway, it was tricky thinking of something that they could make in 30 minutes, didn’t require drying time, and suited boys and girls.

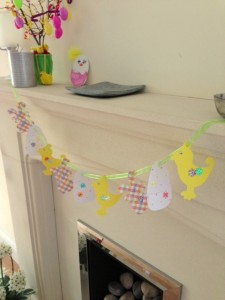
We decided on an Easter garland.

I made mine using pretty papers and some embellishments from my stash so the children had an example to look at, but the children used coloured papers provided by the school.

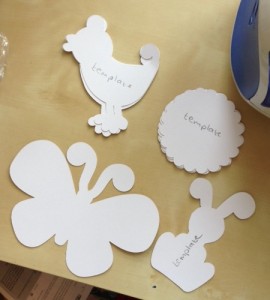
I made the templates using some card and my Sizzix Eclips cutting machine.   It uses cartridges so you can cut a variety of shapes and letters, and it is fully adjustable so you can set the size, material you are cutting and version of the image.   I made them all about 4″ tall and cut the shadow versions of the shapes to make them more substantial for the young children in the club.

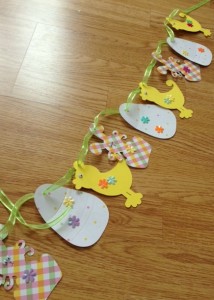
All I had to do then was make a hole using the small setting on my crop-a-dile, and then thread some ribbon through.   The children used wool to string their ones up as it’s a lot cheaper for 40 children to use that rather than ribbon.   They decorated their shapes with coloured pens and pencils.   Due to some of the older ones breaking into songs (with actions meaning they couldn’t use scissors!), some of them went away to be finished at home.

Later that day I did the same activity with the Guides.   They are older and we had more time so the garlands went away completed and with a bit more detail.

What Easter crafts have you done with your kids?

School Craft Club

A little while ago, the Head at my little ones’ school asked if  mums would like to start any lunchtime clubs, such as a craft club.   I already help out once a week as a Parent Helper in a KS1 class and love it, so an extra 30 minutes at lunch time once a week crafting with kids would be a bonus.   Another crafty mum also volunteered, so eventually we got together, made a few plans, and waited to see who would turn up.

Week one, we had 40 children from year one to four!   That was a bit of a shock to the system, especially as we were making pin badges.   The children all decorated a paper circle which I put through a badge machine.   This serves as a name badge so we can identify the kids, and also as they leave it behind after craft club, we can use it as a register to see who turns up.   With 40 children crammed into a spare classroom, we’ve  had to close the club to new members, but if some don’t come back for a few weeks, we can open up new places to kids who have wanted to join since.   If you don’t have a badge, you ain’t coming in!

Somehow, while I was punching badges, the other mum managed to get ideas from the children about what activities they wanted to do in future.   I think some expect a host of sewing machines to appear so they can make cushion covers, or multiple tools for jewellery making, but some were doable.

Week two was a bit easier due to a school trip taking half the children away.   One of the ideas was to make a diary of all the things they’d made, so a simple piece of coloured paper, decorated as they wanted, and folded with a couple of pieces of A4 made a notebook.

Week three was back to a full strength class of around 30 children.   We collected together some magazines and the children made collages.   Some were random pictures, others were fashion collections, bedroom designs or composite pictures.   The mess at the end was amazing, but they had great fun with scissors and glue.

Hopefully as I get more organised, I’ll take some pictures and blog about the activities in a bit more detail.

Does anyone else craft with lots of kids or run a school club?

Cable Knit Cushion

My WIP busting continues with the completion of my cable knit cushion today.

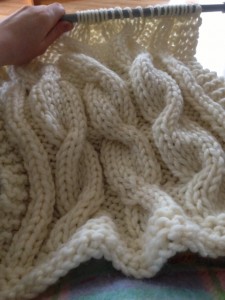
Having progressed my knitting skills by knitting a lacy snood and scarf last year, my next target was the conquest of cable.   A visit to my local knitting shop came up with some chunky wool, large needles and a pattern downloaded from Ravelry.

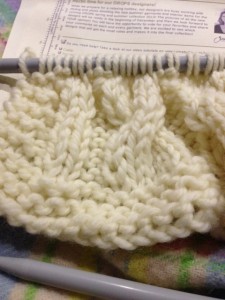
My first attempt was a disaster.   The pattern was badly written for beginners so I just twisted round and round without reversing the stitches.   Back to the shop for some advice and I was off and produced my first cable twist.   I was so pleased with it!

Being chunky knit, it grew quickly which is always good in my book.

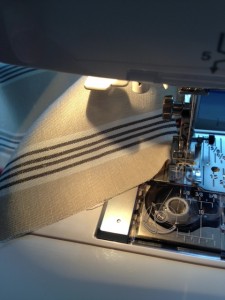
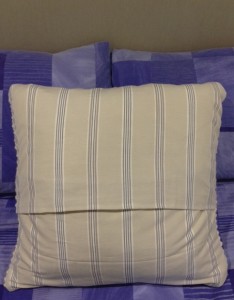
It was a lot larger than I thought it would be (I had to buy a 55cm cushion pad), but I was enjoying how well it came together so much I didn’t mind.   I did decide that I wasn’t going to knit the reverse though (I have the patience of a very impatient thing) so I found some lovely fabric in John Lewis (purchase allowed under my challenge rules as it helped me complete a project) and made an envelope back.

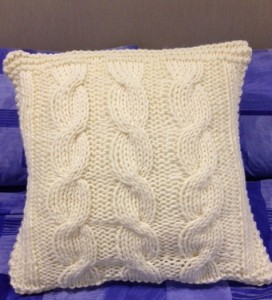
And here it is on my bed.   It goes well with the new decor, although I still need to change the bedclothes when I get a bit more inspiration.

So what do you think?

Knitting Needle Rolls

On one of my recent crafting exploits into new things, I attempted cable knitting.   I got a bit stuck and the lovely @knittingvillage came to my aid and explained the pattern.   I’ve finished knitting the cushion front now and just need to sew the back on.   Another WIP on the list!

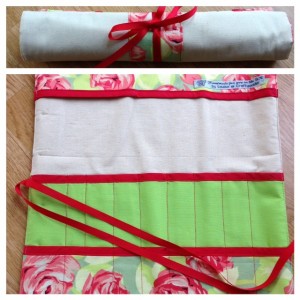
A few days ago, I had a tweet asking if I made knitting needle rolls as one of the customers in the shop had asked for them.   I didn’t have any in stock, but I had plans to make some for my website and craft fairs this year so I bit the bullet, cut some fabric (shock, horror!) and made three similar to this one I made for a swap some months ago.

This was the first one made with some fabric I bought for one of my ‘just in case’ projects.   I’m definitely making some things for me with the rest.

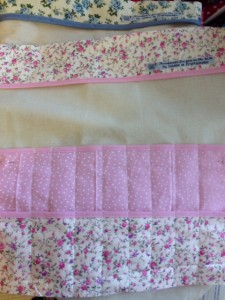
I also made one in pink

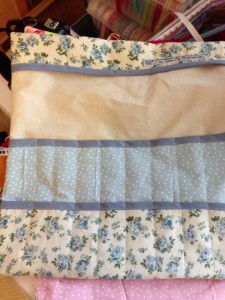
and this gorgeous blue combination

and all three were finished off and taken to Knitting Village in Buntingford to see if she could sell them.   I’ll also be starting crochet hook rolls and other accessories to sell (and perhaps a couple of bits for me!)

If anyone is interested, I’m selling them for £15, and as usual, all profits go to local Guiding.

Fairy Dresses

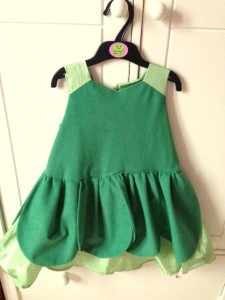
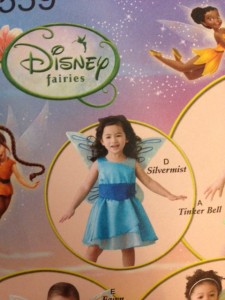
Two and a half years ago, the Craftyguider family was invited to my cousin’s little girl’s 4th birthday party.   She’d chosen to have a fancy dress party, so being the glutton for punishment crafty mother that I am, I decided to make a Tinkerbell dress for my eldest who was the same age.   To make things fair, I also bought a pattern and fabric to make a dress for my youngest afterwards.

Tinkerbell was delivered on time and my eldest loved it.

Next up was one of Tinkerbell’s friends, Silvermist.

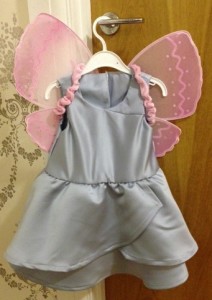
I remember cutting out all the fabric for an age two girl so my youngest could grow into it.   And that’s where it stopped.   Last year I even put it on my list of things to achieve before the year was up, but even then it would’ve been too small.   It was destined to stay in the WIP pile until I realised that my friend’s little girl was due to be two.   It only took an afternoon to sew the bits together and Silvermist was born.

I added a pair of wings from Amazon (a last minute purchase as I forgot, and you can’t be a fairy without wings!) and the dress was delivered to the birthday girl today.   I think she liked it, and now she can play fairies with her big sister.

Another WIP finished!

Patchwork Quilt

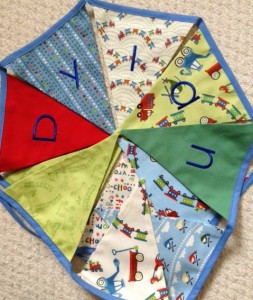
The latest project in my completed WIP list started as a background to a bunting commission.   The recipient was a boy (alien species for a Guide and Rainbow leader and mother of two girls!) and the theme was transport/trains.

Once again twitter came to the rescue with suggestions of fabric shops in Cambridge.   After dragging my 3yr old round three of them in the rain, we came to the last and found Sew Creative had a layer cake (10″ squares of fabrics) of Riley Blake Designs ‘Scoot’ fabrics.   This combination of fabrics seemed perfect for the brief but I couldn’t make bunting efficiently from a layer cake.   It was then I decided to make a quilt as a Christmas present from the layer cake, and if the customer liked the fabrics, I could buy a fat quarter bundle from elsewhere to make the bunting.

With the fabrics approved, the bunting was delivered, and I hope Dylan liked it!

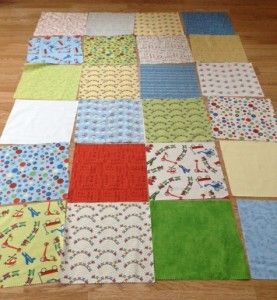
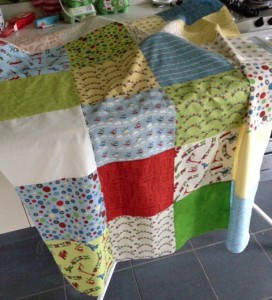
With my layer cake at the ready, I was determined to make my first proper (ish) quilt.   I have made quilted patchwork cushions before, but nothing on this scale.   However, I soon realised that my original intended recipient wasn’t suitable, so the project was parked.   This was until two good friends sent an invitation to their baby’s baptism.

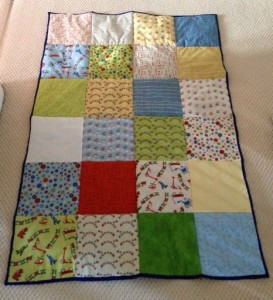
As it was only 24 squares, I thought it could be a play mat, quilt or sofa snuggler, so my 3 year old and I spent some time arranging the squares.

Having photographed the layout, this made it easier to make up as I knew which bit went where.   I then quilted ‘in the ditch’ (along the lines between the squares) using batting and a royal blue backing fabric.   I figured this would be practical if it was used as a play mat.   After this I was in unknown territory as I’d never bound a quilt before.   I found a ‘self binding’ tutorial and had enough fabric round the edge to fold over and sew.

It is wonky in places, it’s far from perfect, but I was pleased with it as my first attempt.   When I have a bit more time, I might try something a bit more technical and time consuming, but for now, I’ve handmade a gift, gained a new skill, and completed another WIP.


Needle Felting

The latest in my series of WIPs that I’ve conquered is needle felting.

A year ago I bought some wool roving and tools to start needle felting.   The desire to try stabbing wool with needles to make felt was inspired by Kirstie Allsopp’s Handmade Britain programme.   Like many of my crafts, it sat in it’s box ready to be started whenever ‘that’ moment came.

A year later, the box was still tucked away neatly in the cupboard when I received my latest Crafty Creatives box.   For those not in the know, this is a themed box of craft goodies that arrives in the post every month.   January’s theme is Woodland and there was a needle felting kit included.

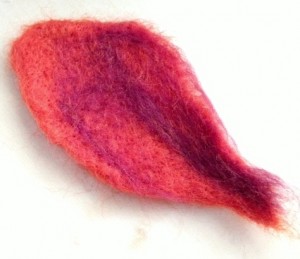
This is my first attempt at making a leaf from the kit.   You collect strands of the wool roving, lay it criss cross over itself on a pad and then stab it with a special barbed needle.   After turning it over and stabbing the reverse, you can start shaping it and then adding features.

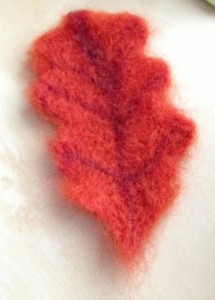
This is my slightly more successful second attempt which I was aiming to be an oak leaf.

I used my multi needle tool I’d originally bought as it has a safety collar.   I didn’t trust myself with a barbed needle unprotected near my fingers!   My next project will be to make some 3D models (I’ve seen a cute tutorial for an owl somewhere).   Hopefully it won’t take me another year to get the box out of the cupboard again.

Mittens

I like knitting.   I don’t love knitting, and it once took me 5 years to finish a jumper which I wore twice and then donated to a charity shop.   I therefore prefer knitting little projects where I can see the progress, and more importantly, the end stays in sight!

One of my challenges to myself this year is to complete all my WIPs and use up my stash before buying new bits which I lovingly stroke and then put away for the ultimate project which will come around one day but never does.   This will save me heaps of money, and more importantly free up lots of space in my craft room/family office.

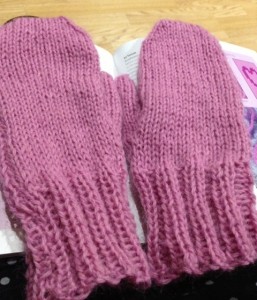
My latest make is a pair of mittens.   I’ve always wanted to make gloves but decided to start on a pair of mittens to ease me into the techniques.   I chose the Cosy Mittens pattern from Louisa Harding’s Knits for Hats, Gloves and Scarves book.   The pattern was quite easy to follow but did require a bit of knitting knowhow to interpret.

The pattern was supposed to fit a child aged 5-10, but they are too big for my 6 year old.   They almost fit me!

Nevertheless, I have finished them, learned a new technique and ticked off another WIP.   As for the progress on my craft spending challenge?   I’ve bought some sellotape, tape runners and some promarker storage.   Success so far!

Crafty Challenge 2013

I’ve read about everyone’s resolutions and #365 challenges on blogs and on twitter.   Following on from my last blog post, I haven’t made any resolutions and I wasn’t going to enter into any more challenges.

However, taking stock of all my WIPs (work in progress) and work-not-yet-in-progress-but-I’ve-bought-the-stuff, the mountain of 12″x12″ papers, my 4 huge boxes of fabrics, my embellishments, card making kits, felt stash, magazine freebie kits etc etc etc, I have decided to try and finish my WIPs and not buy anything new until they are.

Now there will be exceptions to this.   I currently need some more glue dots and adhesive and my cards aren’t going to get very far without them.   Therefore, general sundries have to be permissable.   Also, if I have a Craftyguider commission or need to make something specific for someone as a gift (3 babies in 2013 in the next few weeks that I know about!) I can buy something.

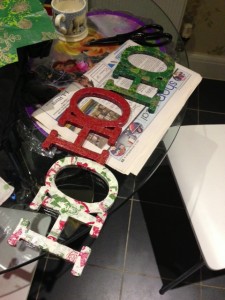
Today I finished my Christmas HO HO HO decopatch I bought in October.

I’d done the white and red HO’s but not the green one.   All the HO’s have glitter mod podge on them and I’m really happy with it.

Don’t expect a make a day or even a week.   I have quite a few large cross stitch kits to finish amongst the WIPs as well as some very quick ones.   Hopefully I will save some money, make some room in the office, and do some crafting for me.

Polka Dot Swap

How could I resist polka dots?   OK, how could I resist another Popular Crafts swap!   Well anyway….

I was partnered with @artesania62, another tweep who I follow already.   Reading her bio, knitting and learning to crochet are her things, as well as bright colours, going out and things that are useful.

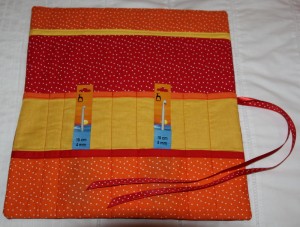
On one of my not so rare trawls through Hobbycraft, I found a bright fat quarter bundle with a matching polka dot fat quarter bundle.   I’ve been wanting to try a knitting needle roll for ages so thought that fulfilled all her wants.   After a research trip through some online tutorials, I came up with this.

I was so pleased how it came out, and amazed that I had coordinating bias binding in my stash!   I will definitely be making my own version for the website.

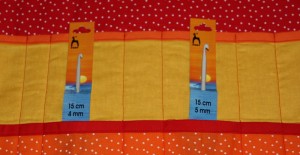
The crochet needles are her treat, although looking at her gorgeous crocheted creations recently, she’s not a beginner any more!

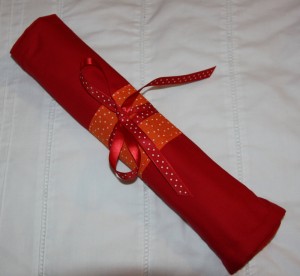
Wrapped up, the roll looks like this.

I posted it first class on Wednesday and was the first person at the post office as it opened.   However her meany postman didn’t deliver it on Thursday so I’ve had to wait longer to see if she likes it.

I’m already signed up for the Strawberry Swap so can’t wait to see who my swap partner is this time.